 Universal Pokémon Randomizer FVX
Building the Universal Pokémon Randomizer FVX
This page is to help aspiring developers learn how to build the Randomizer; if you’re not interested in development, please download an official release from our release page instead. Versions of the randomizer built via the steps on this page will not be officially supported!
General info
The Universal Pokémon Randomizer FVX is written in Java 25 using IntelliJ IDEA. It is built and tested using Gradle.
Setting up the project
The main developers of this Randomizer use IntelliJ IDEA to develop, build, and test the Randomizer. Other Java IDEs may or may not work (they will probably not include the right GUI editor), but IDEA is the only one that works for sure. The following steps assume you’re using IDEA:
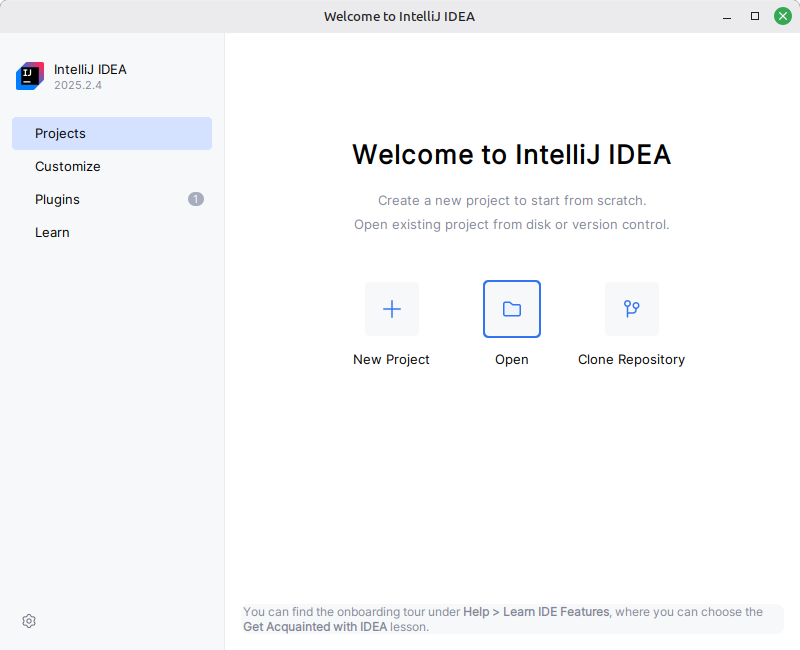
- Download and install IntelliJ IDEA. The free Community version is fine.
- Clone the randomizer’s source code to your machine like so (if you are unfamiliar with Git, we recommend the first 3 chapters of the Git book):
git clone https://github.com/upr-fvx/universal-pokemon-randomizer-fvx.git - Run IntelliJ IDEA. On the initial window, select “Open” then select the universal-pokemon-randomizer-fvx folder that you cloned in the previous step.
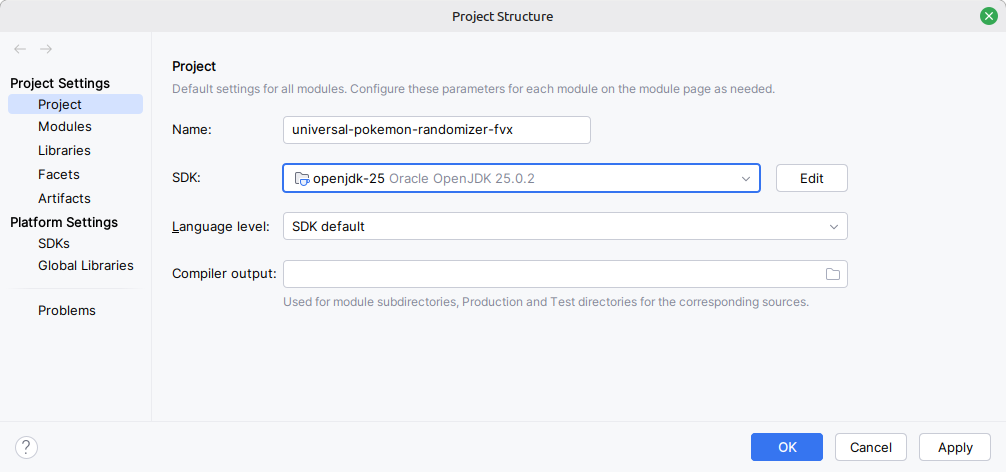
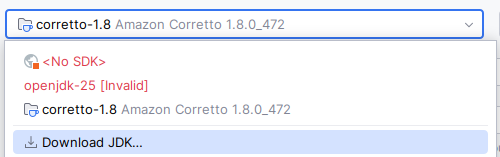
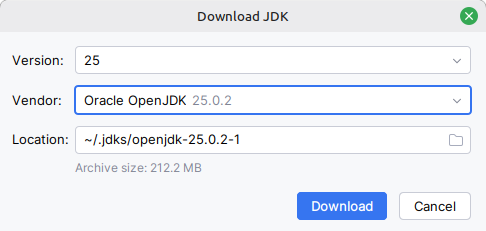
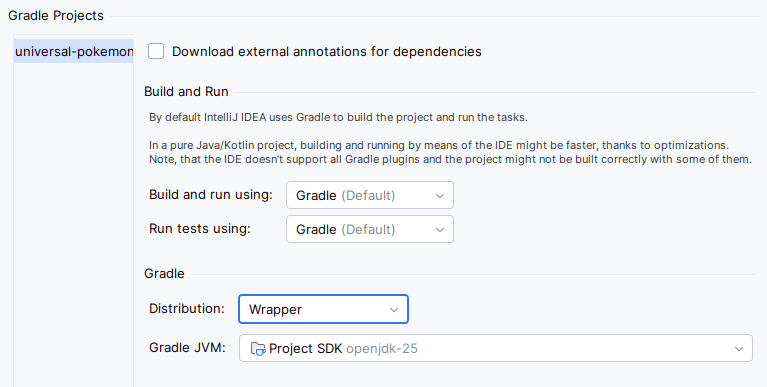
- Under File -> Project Structure -> Project, ensure that the “Project SDK” is set to 25. If you do not have any version of 25 available, click the “Project SDK” dropdown to expose the “Download JDK…” option, then download any 25 version. It should now be selected as your Project SDK.
- On the same screen, ensure the “Language level” is also 25.
- Under File -> Settings -> Build, Execution, Deployment -> Build Tools -> Gradle, ensure the project is built and ran using Gradle, and that the Gradle JVM is the Project SDK.
Building and launching the Randomizer (quick)
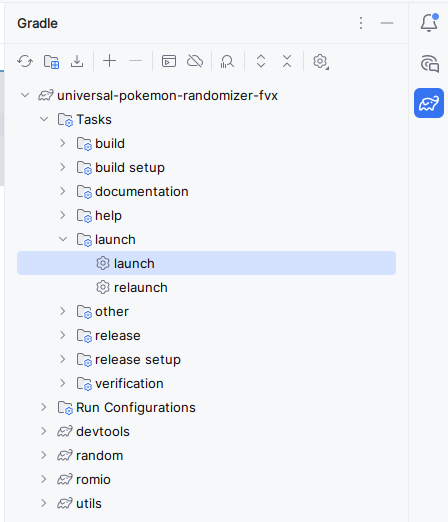
Assuming you followed all steps in the previous section, you should see the elephantine Gradle icon near the top-right corner of IntelliJ. Click on the icon, and navigate to “universal-pokemon-randomizer-fvx -> Tasks -> launch”. There should be a launch task next to a cog icon. Double-clicking that will build all code and run the Randomizer if the build is successful.
Congrats, you’ve now built the randomizer!
Building, launching, testing and releasing the Randomizer
The random:launch task (seen above) is the easiest way to get the Randomizer running locally, but there are other Gradle tasks.
random:relaunch (in the “launch” group) will re-launch the Randomizer without building it again. This is useful if you want to manually test config.ini, or just accidentally closed down the window and don’t want to re-build.
test (in the “verification” group) runs all tests that don’t rely on supplying ROM files. The general test task runs the applicable tests for all modules, but utils:test and romio:test can also be run separately.
romio:testROMs and random:testROMs (in the “verification” group for each module) runs all tests that do rely on supplying ROM files. These ROM files should be put in roms/, according to the format described there. Which ROMs are tested, is controlled within the RomHandlerTest and RandomizerTest classes.
Releasing the Randomizer
(this section is about tasks for releasing a new Randomizer version, and won’t be needed for most developers)
random:createReleaseZips (in the “release” group) prepares the zip files for a Randomizer release. They end up in random/build/dist.
docs:finalizeReleaseNote (in the “release” group) finalizes release-note-next.md. This removes comments, adds Liquid front-matter, and finally renames it [version].md. A new release-note-next.md is then created, by copying release-note-template.md. Note that some steps of finalizing the release note must be done manually before running this task. These steps are explained in release-note-next.md.
When creating a GitHub release, its tag must be vFVX[version]. E.g. vFVX1.4.2. Otherwise, the download links on the (non-GitHub) website won’t work.
About Java runtime images (jlink and jdeps)
(this section is technical, and won’t be needed for most developers)
The Randomizer comes packaged with its own mini-version of Java, a so-called “Java runtime image”. This runtime image contains everything the Randomizer needs to run, and is automatically created by Gradle tasks. Older versions of the Randomizer instead depended on separately installed Java runtimes, but this essentially locked the codebase to Java 8.
To build a runtime image, the jlink utility is used. jlink takes a list of Java modules as an argument, and creates a runtime image containing only those modules.
To know which Java modules the Randomizer uses, the jdeps utility is used. jdeps takes the compiled JAR file, and outputs which modules are used. Sadly, this output is not complete; any module “not found” must be manually identified. Due to this manual step, the random:jdeps task must also be run manually. Whenever a new dependency is added, or strange “class not found” errors are encountered, running random:jdeps is wise.
Wiki pages:
- Randomizing the 3DS games
- About Java
- Building the Universal Pokémon Randomizer FVX
- CLI Randomizer
- Custom Player Graphics
- Estimated Evolution Levels
- Evolutions
- Home
- Important Info
- Items
- Known Issues
- Move Names
- Moves
- Movesets
- New Feature Summary
- Pokemon Base Statistics
- Static Pokemon
- Code Structure of the Universal Pokémon Randomizer FVX
- Wild Pokemon